I have not updated anything I have done for more than a year … bad me. So I am just going to scroll through some photos on my phone for a start.
My local SCA group has a camping event: “Talon Crescent” that they were updating into a war for the first time. Talon Crescent War I. Our amazing local Arts and Sciences Minister stepped forward and said that the local Arts and Sciences community would produce gifts for any teacher at the war. When this was first discussed the thought was that we were looking at 25 – 30 teacher … then 30-35 then 35-40. In the end we produced 48 gifts. Slightly too many and the last few went to the Royalty attending.
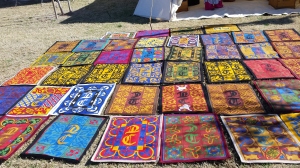
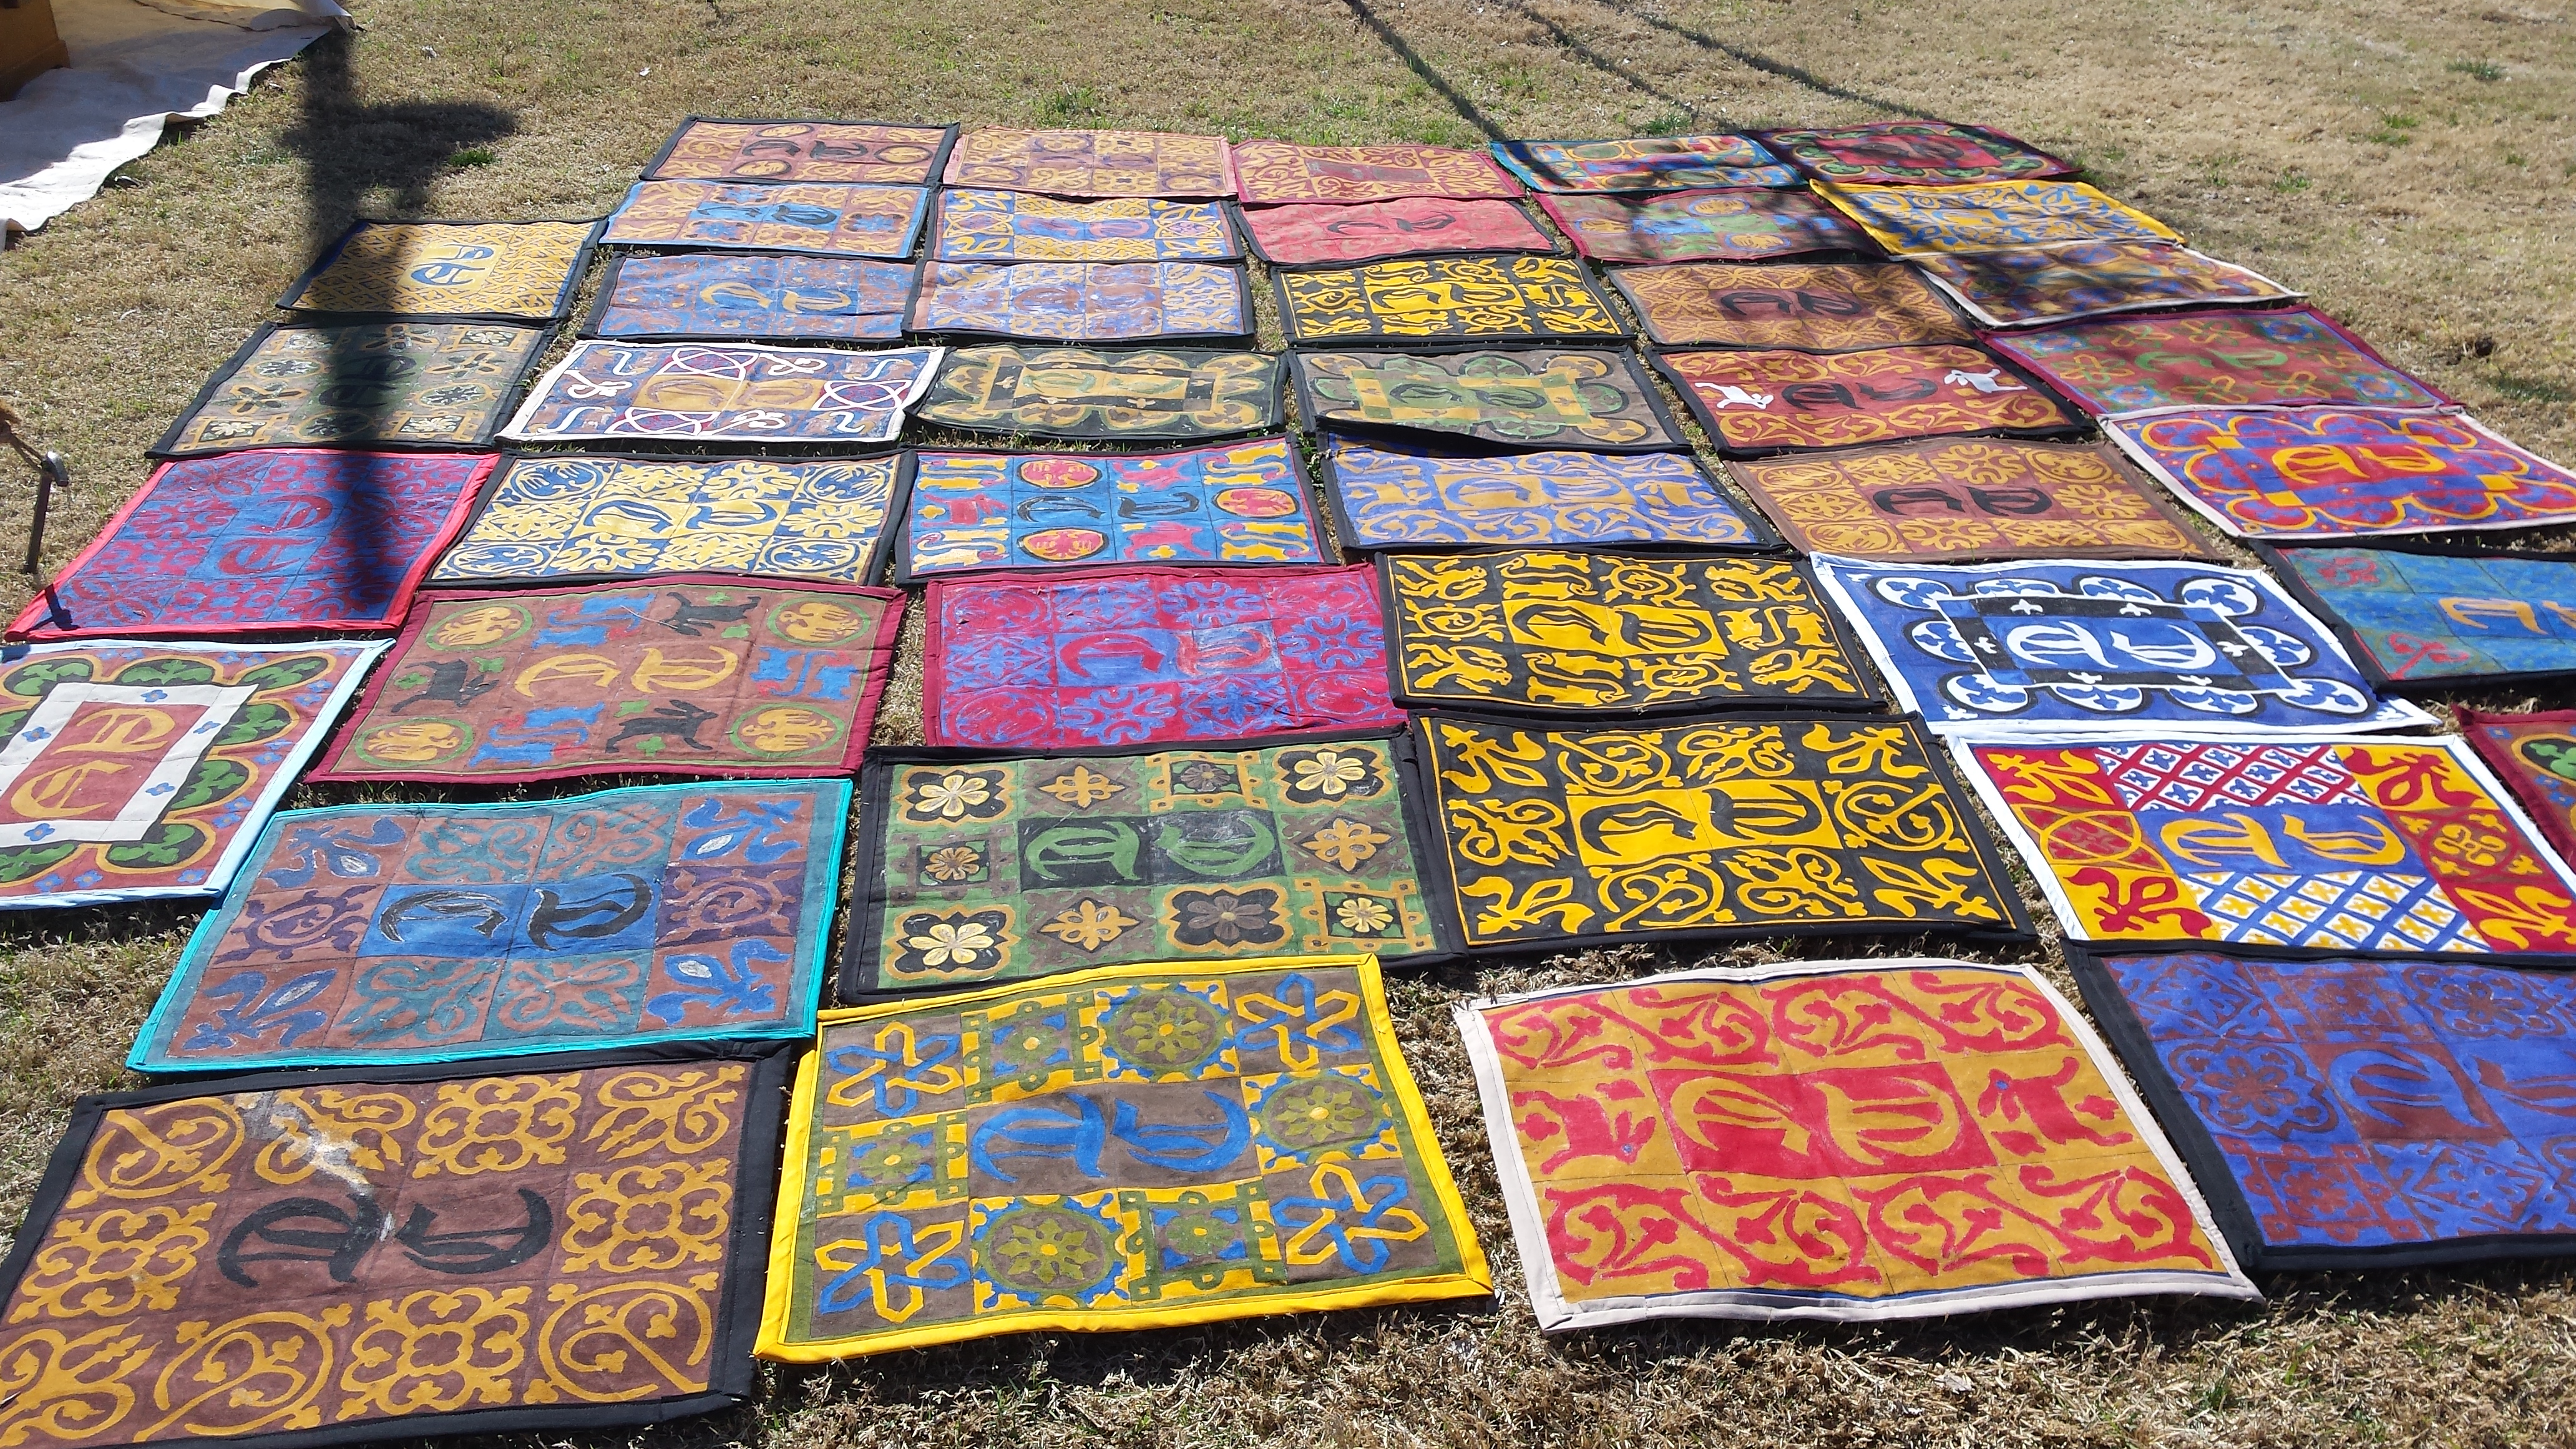
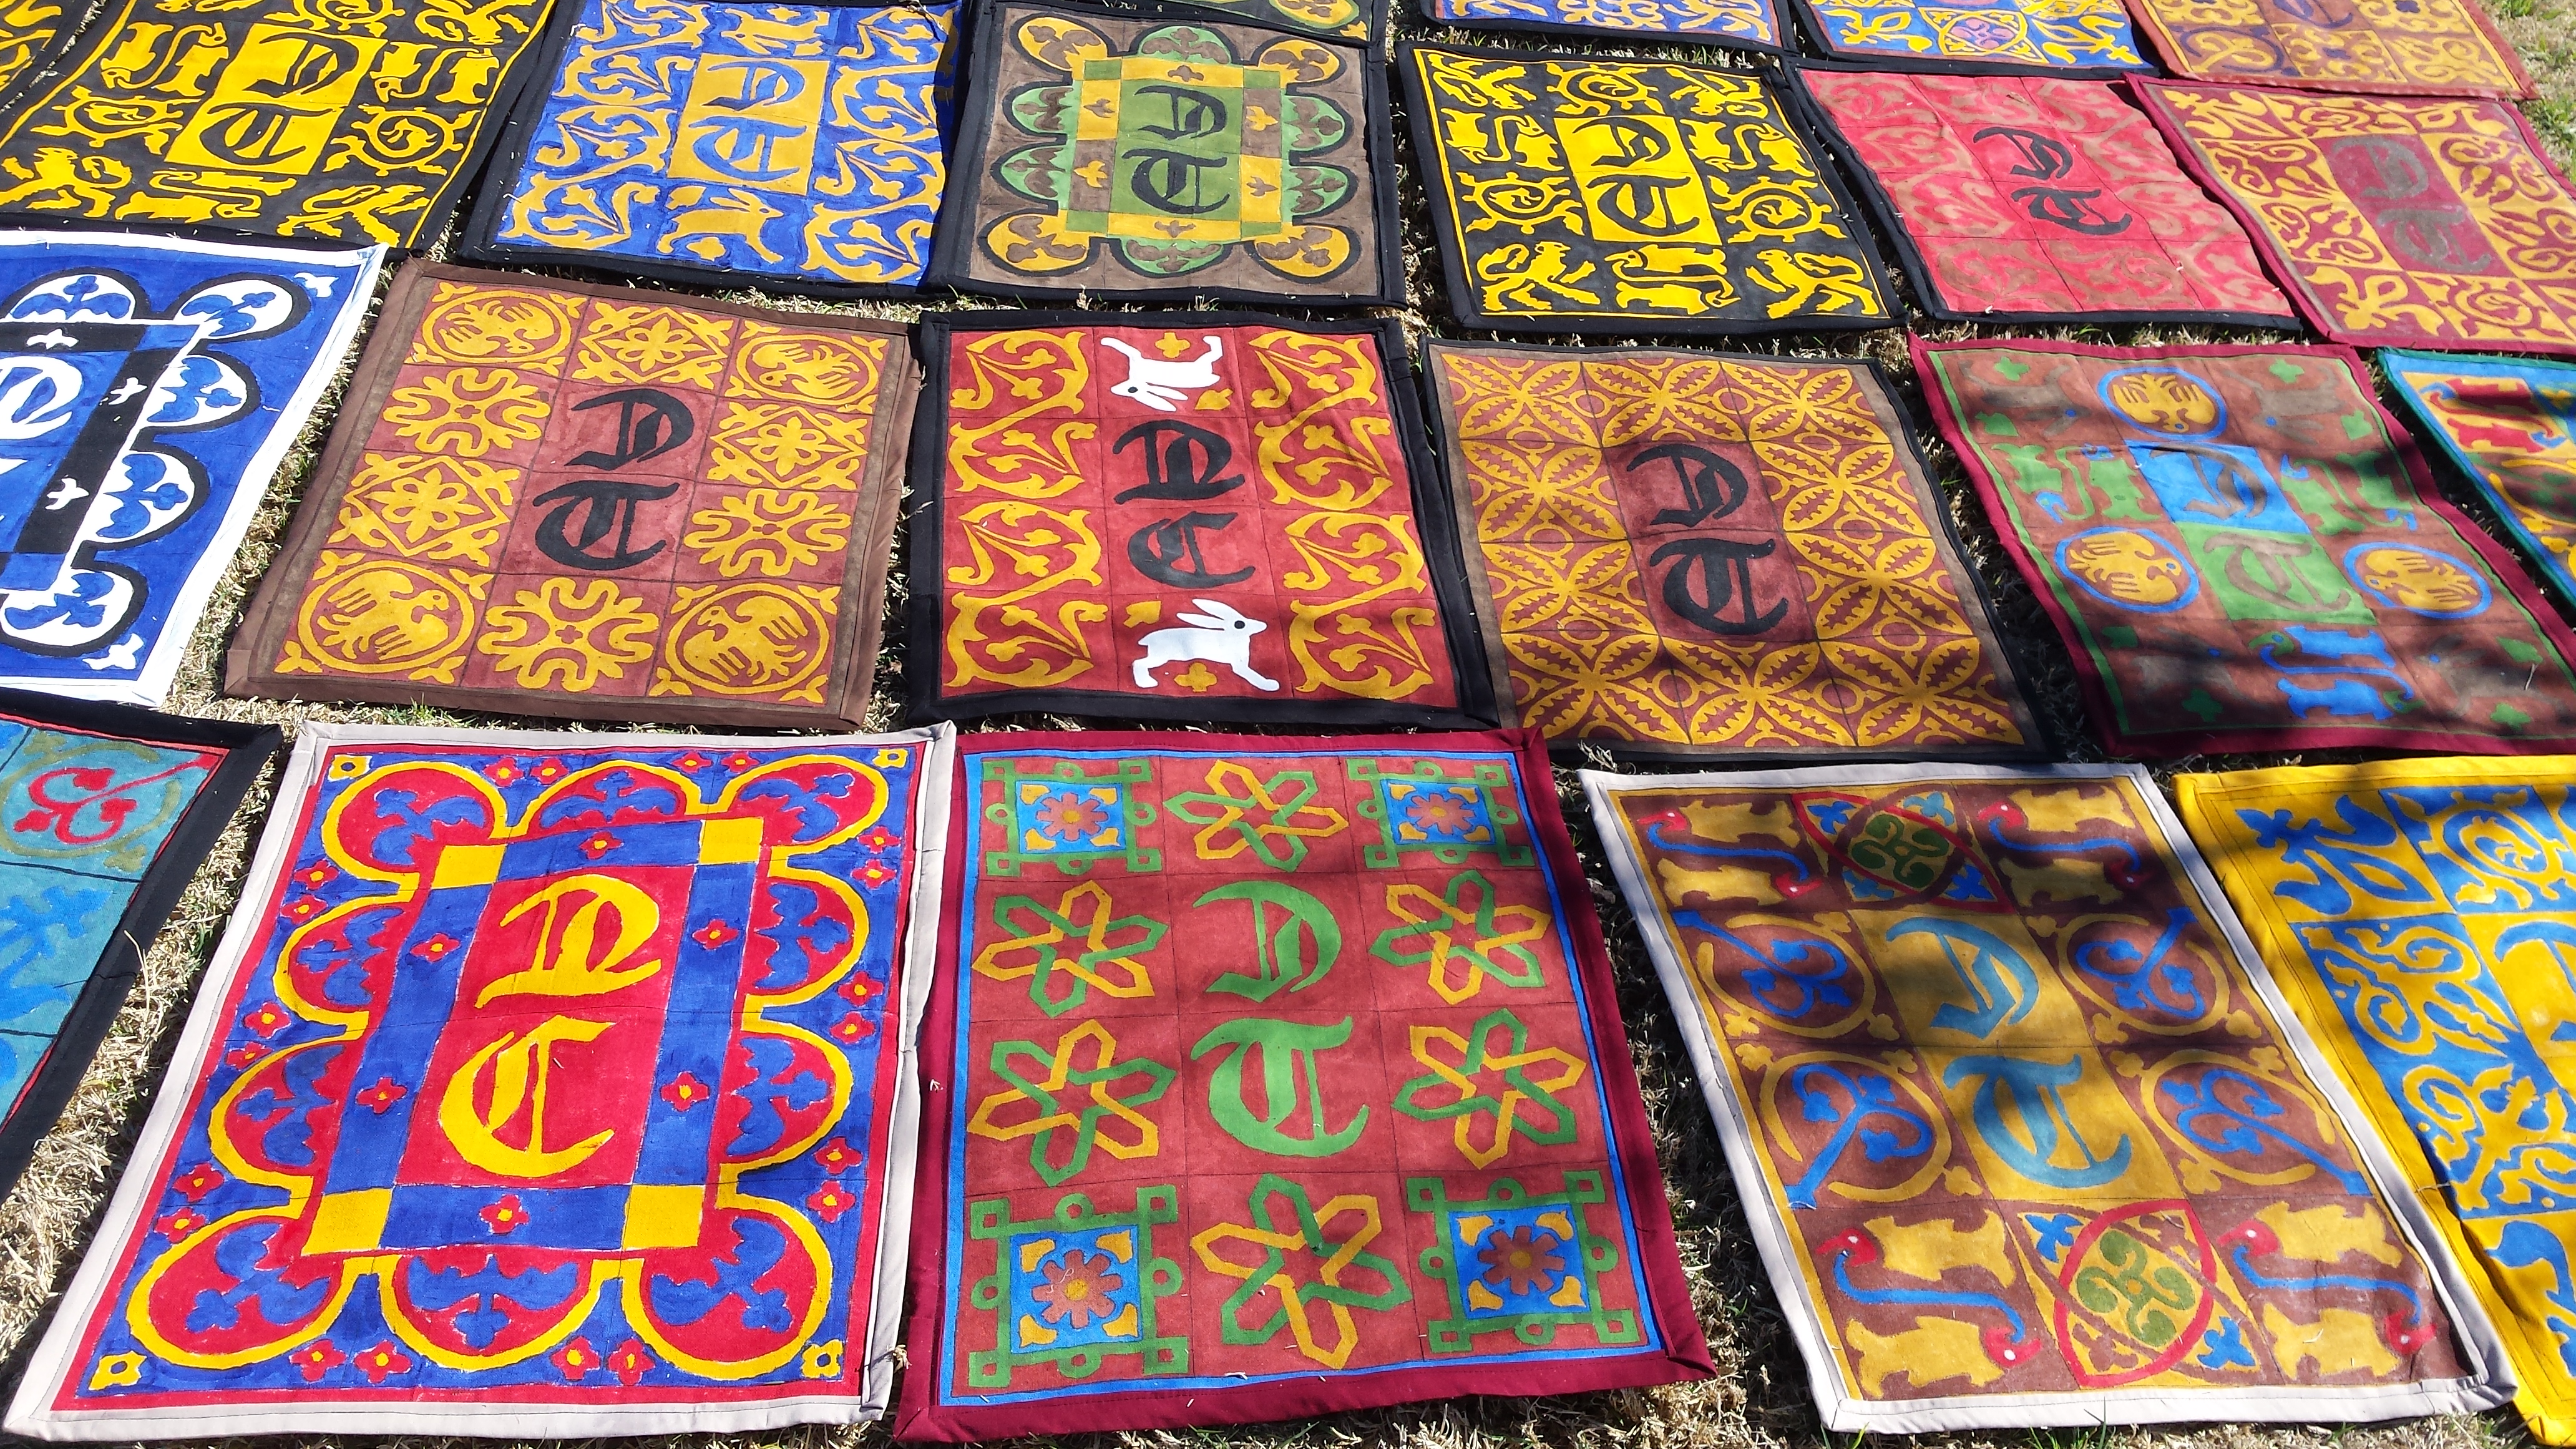
I had the idea to paint entrance mats based on period tile designs.
Materials:
* Good old cotton painter’s canvas drop cloths: I cannot overstate the usefulness of painter’s drop cloths around a camp. They are cheap yet sturdy and super easy to paint up. Any hardware store has them and you can get 6ft by 9ft for just over $10.
* Acrylic Paint: The cheaper the better. Years ago when I started to look for paint to adorn my canvas tent I looked into many specialty canvas paints. A long time SCAdian told me to stop stressing. They had painted their tent more than 15 years before with cheap school acrylics straight out of giant jars, and I while the canvas has seen so much camping that it was now dying the paint still look fine. I painted the dags of my tent in cheap acrylics and it has since stood up to some serious use. Acrylics is basically plastic, and if you take the time to set it well it will last you a lifetime.
*Heavy cotton backing.
*Bias tape.
I divided the surface of the 12 squares. The middle 2 would be a T and a C (for Talon Crescent) and the other a combination of designs. I drew and cut out about 30 (maybe even 40) designs (I really should pay more attention to details like this) and arranged and traced them onto the canvas with pencil.
I had a fair bit of help with the actual painting. Painting almost 50 welcome mats proved to be a HUGE task. After the painting is done the paint is set with a hot iron. Take your time. You can actually feel the texture of the paint change before and after ironing. Afterwards it has a much slicker plastic feel.
The backing was attached by sewing along the “tile lines”. Then the edges was finished by bias type (usually homemade – just strips of fabric).
I am not sure how many of the mats I painted, (very near to 20) and I prepped and tranced each mat and then ironed and finished them all.


love those designs and colours! the patterns you’ve painted on these are wonderful!